WiFiManager for App Blynk and NodeMCU-12E
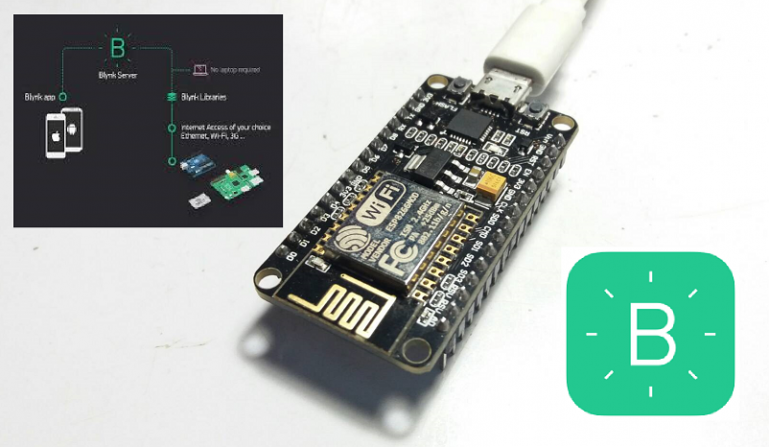
การทดลองโครงงานนี้จะเป็นการใช้ App Blynk เชื่อมต่อกับสัญญาณ WiFi ในโหมด AP : Access Point โดยใช้ NodeMCU-12E เป็นตัวประมวลผล ซึ่งจะช่วยให้เราสามารถเชื่อมต่อกับสัญญาณ WiFi ได้ง่ายและสะดวกต่อการนำไปใช้งานในสถานที่ต่างๆ โดยไม่ต้องโปรแกรมสำหรับเปลี่ยนค่า Username และ Passs word ใหม่ครับ.
- ให้เราโปรแกรมคำสั่งของ NodeMCU-12E ผ่าน Arduino IDE ก่อน
- จากนั้นให้เราเปิดหน้า COMx จาก Arduino IDE หน้าตาจะเป็นดังรูปข้างล่าง
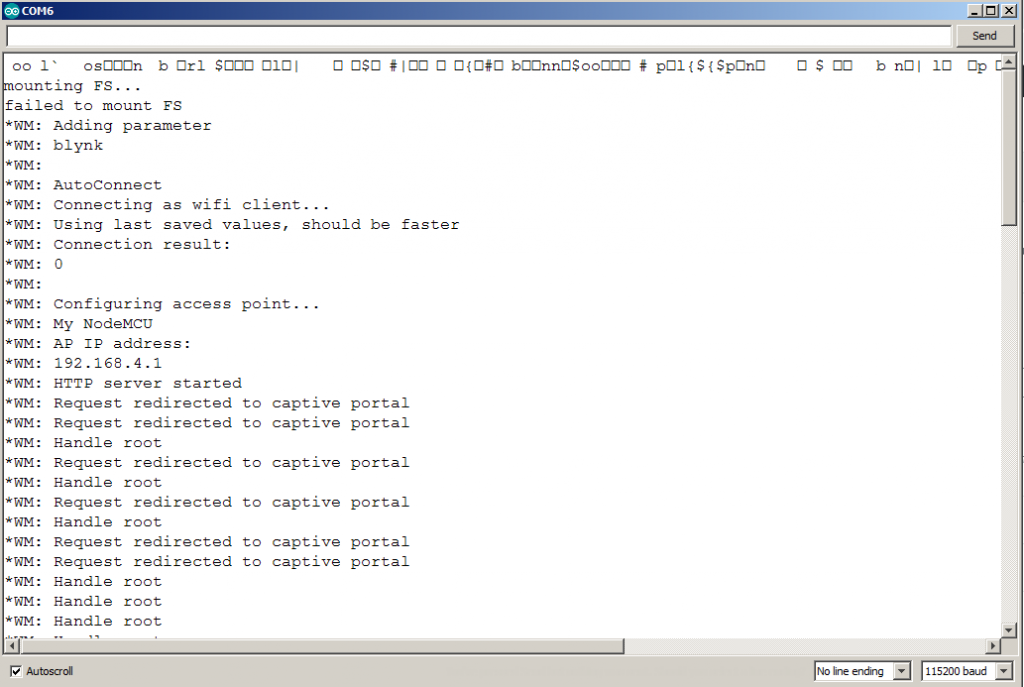
3. ให้เรากดสวิตช์รีเซต (RST) ที่บอร์ด NodeMCU เราจะเห็น AP IP address ที่แสดง 192.168.4.1 ให้ทราบเพื่อให้เราเข้ามาป้อนค่า Username และ Passs word ของสัญญาณ WiFi ที่เราต้องการเชื่อมต่อ
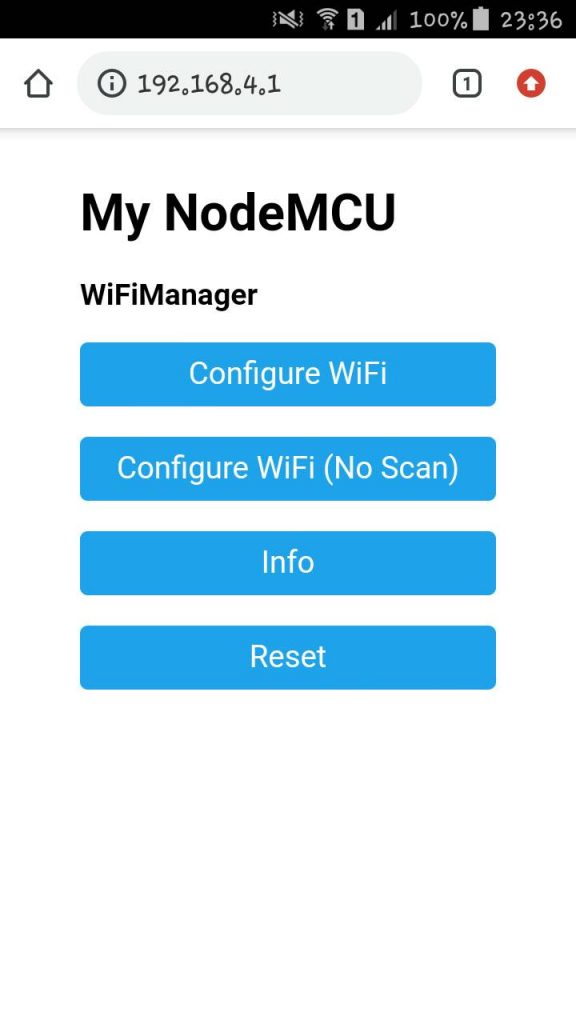
4. จากนั้นให้เราไปที่โทรศัพท์มือถือเลือกการเชื่อมต่อสัญญาณ WiFi ในตัวอย่างจะเป็น My NodeMCU ตามรูปข้างล่าง

5. เมื่อเชื่อมต่อได้แล้วเราจะสังเกตว่าที่หน้า COMx ของ Arduino IDE จะแสดงข้อความการเชื่อมต่อแล้วให้ทราบคือ My NodeMCU
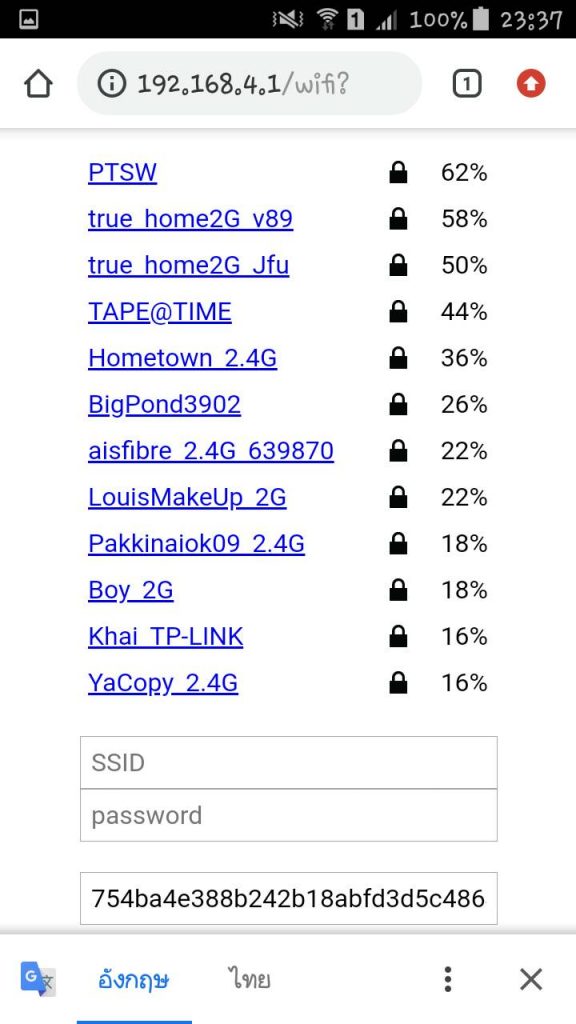
6. ให้เราไปที่โปรแกรม ฺฺฺBrowser ของเราแล้วป้อนตัวเลข 192.168.4.1 โดยจะมีข้อความแสดงดังรูป
7. หรือจะพิมพ์เพิ่มจาก 192.168.4.1/wifi? ซึ่งจะป้อนค่า Token ID มาให้เราทันที่และเราแค่ป้อน Username และ Passs word เท่านั้น
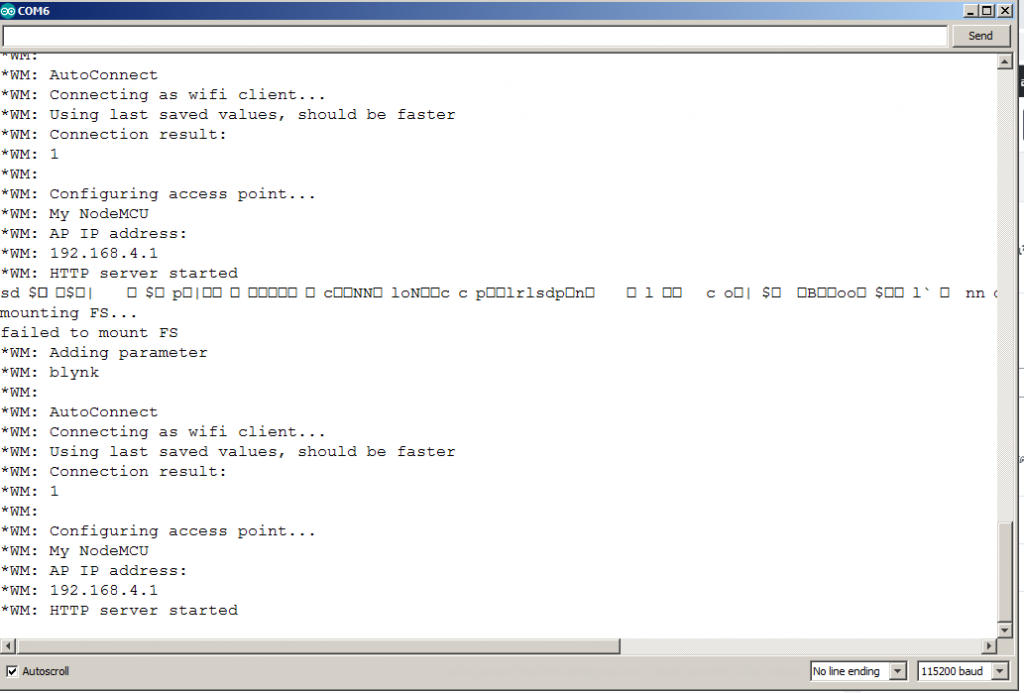
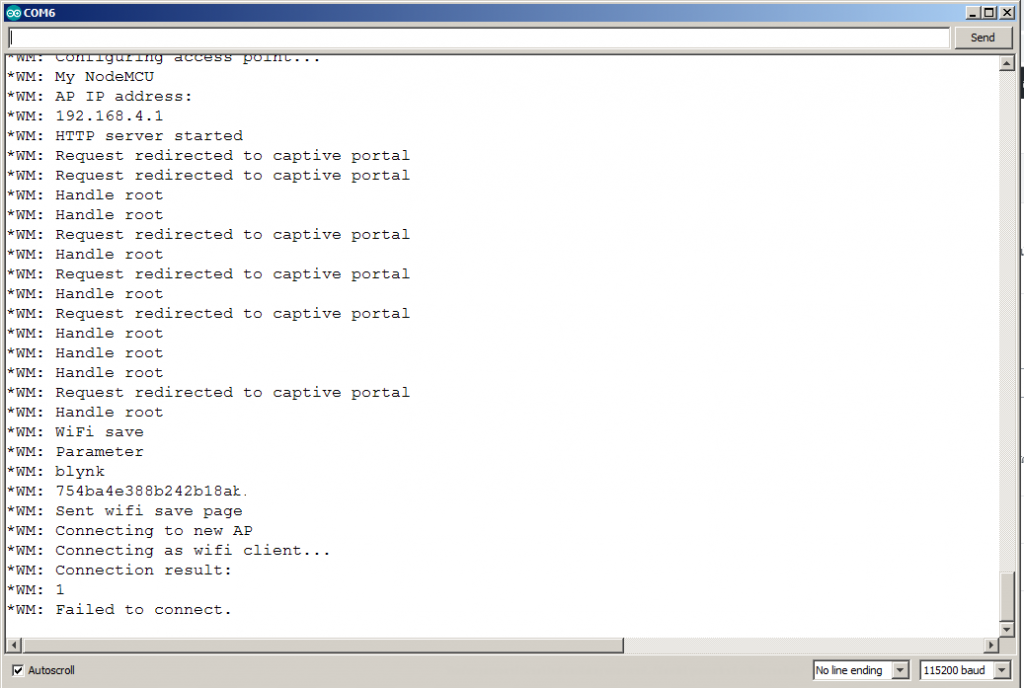
8. ในตอนนี้ที่เราป้อน ค่า Username และ Passs word นั้น จะเป็นการบอกว่าให้ NodeMCU เชื่อมต่อกับ WiFi ที่ต้องการนั้นเอง และถ้าเราดูที่ COMx ของ Arduino IDE จะแสดงข้อความดังรูป (ดูข้อความล่างๆ)
9. จากรูปที่แสดง Failed to connect หมายความว่า NodeMCU ของเราต้องการเข้ามาเชื่อมต่อกับ WiFi ที่เราเลือกแล้ว แต่โทรศัพท์มือถือเรายังเป็นการตัวรับสัญญาณ WiFi อยู่ ให้เราเปลี่ยนโหมดโทรศัพท์มือถือของเราเป็น Hotspot wifi สำหรับการเชื่อมต่อจาก NodeMCU
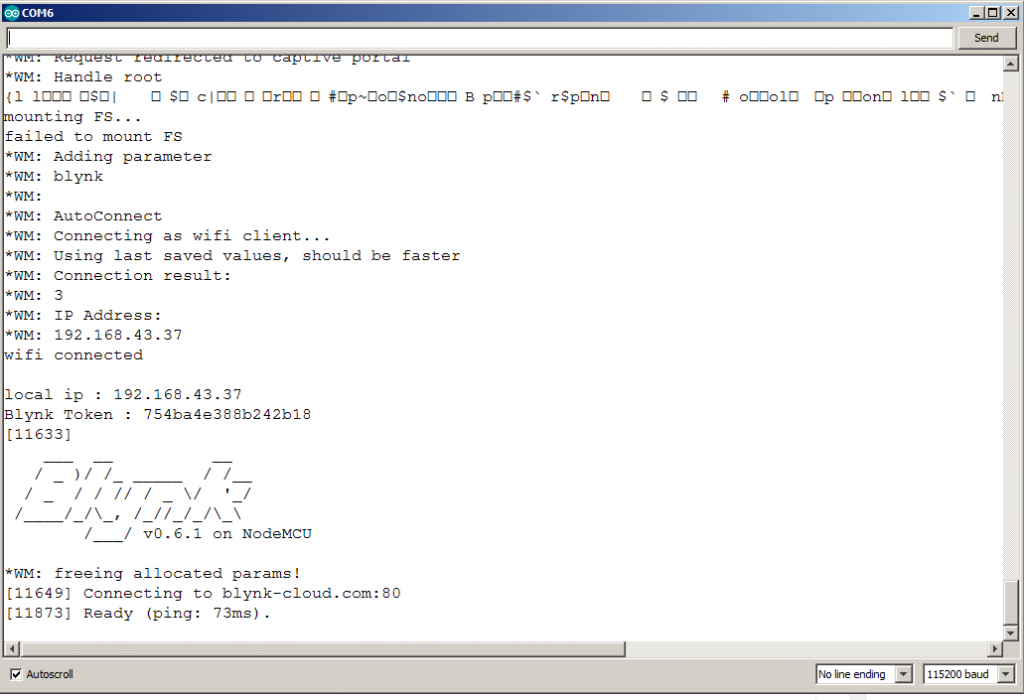
10. ให้เรากดสวิตช์รีเซต (RST) ที่บอร์ด NodeMCU 1 ครั้งและรอสักครู่ที่ COMx ของ Arduino IDE จะแสดงข้อความดังรูป (ดูข้อความล่างๆ)
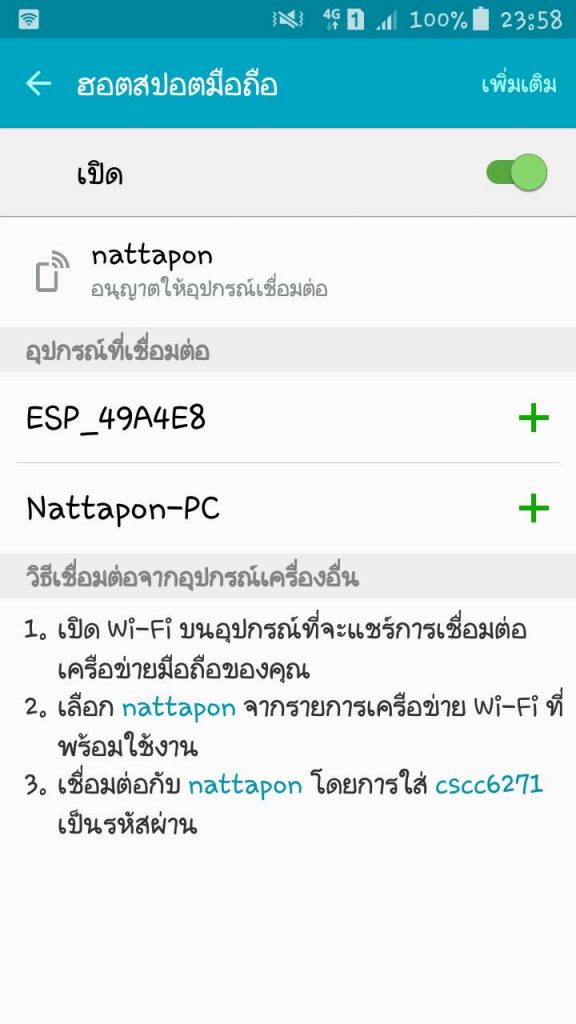
11. เช่นกันที่หน้าจอโทรศัพท์มือถือเราจะแสดงการเชื่อมต่อกับอุปกรณ์ WiFi เพิ่มเข้ามาให้เราทราบแสดงดังรูป
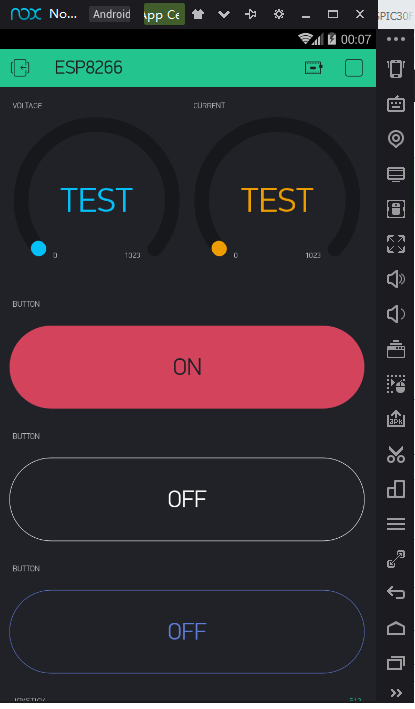
12. จากนั้นให้เราเปิด Application Blynk ใช้งานได้เลย ดังรูปแสดงข้างล่าง
13. ในกรณีที่เราต้องการนำ NodeMCU ไปใช้กับสัญญาณ WiFi อื่นนั้น เราสามารถลบค่า Username และ Passs word เดิมออกก่อนด้วยการกดสวิตช์รีเซต (RST) 1 ครั้งและภายใน 3 วินาที ให้เรากดที่สวิตช์ (FLASH)
14. จากนั้นให้เราเริ่มเชื่อมต่อสัญญาณ WiFi ใหม่จากหัวข้อที่ 5 ตามที่อธิบายไว้อีกครั้งก็สามารถใช้งานกับสัญญาณ WiFi ใหม่ได้แล้ว
โปรแกรมสำหรับ NodeMCU ใช้ร่วมกับ Arduino IDE (แบบที่ 1) *** บางครั้งเรา Copy โปรแกรมไปวางใน Arduino IDE ข้อความในฟันหนู ” ” อาจเปลี่ยนแปลงได้ครับ.
/* Comment this out to disable prints and save space */
#define BLYNK_PRINT Serial
#include <ESP8266WiFi.h>
#include <DNSServer.h>
#include <WiFiManager.h>
#include <ESP8266WebServer.h>
#include <BlynkSimpleEsp8266.h>
//#include <DHT.h>

char blynk_token[] = "754ba4e388b242b18abxxxxxxxxxxx40a9";
// Token xxxxx2018@gmail.com : 754ba4e388b242xxxxxxxxxx40a9
// #define DHTPIN 2 // What digital pin we're connected to
// Uncomment whatever type you're using!
// #define DHTTYPE DHT11 // DHT 11
// #define DHTTYPE DHT22 // DHT 22, AM2302, AM2321
// #define DHTTYPE DHT21 // DHT 21, AM2301
// DHT dht(DHTPIN, DHTTYPE);

BlynkTimer timer;
void sendSensor()
{
// float h = dht.readHumidity();
// float t = dht.readTemperature(); // or dht.readTemperature(true) for Fahrenheit
// if (isnan(h) || isnan(t)) {
// Serial.println("Failed to read from DHT sensor!");
// return;
// }
// You can send any value at any time.
// Please don't send more that 10 values per second.
// Blynk.virtualWrite(V5, h);
// Blynk.virtualWrite(V6, t);
}

void setup()
{
// Debug console
Serial.begin(115200);
// wifi
WiFiManager wifiManager;
wifiManager.autoConnect("AutoConnectAP", "ronin");
Serial.println("baglanti tamam :)");
WiFiManagerParameter custom_blynk_token("Blynk", "blynk token", blynk_token, 34);
wifiManager.addParameter(&custom_blynk_token);
wifiManager.autoConnect("Blynk");
Blynk.config(custom_blynk_token.getValue());
Serial.print("Blynk Token : ");
Serial.println(blynk_token);
Blynk.config(blynk_token);
// dht.begin();
timer.setInterval(2000L, sendSensor);
}

void loop()
{
Blynk.run();
timer.run();
}
โปรแกรมสำหรับ NodeMCU ใช้ร่วมกับ Arduino IDE (แบบที่ 2)
#define BLYNK_PRINT Serial
#include <FS.h>
#include <DNSServer.h>
#include <WiFiManager.h>
#include <ESP8266WebServer.h>
#include <BlynkSimpleEsp8266.h>
#include <ArduinoJson.h>
#define SET_PIN 0

char blynk_token[40] = "754ba4e388b242b18abfd3d5c4XXXXX9";
bool shouldSaveConfig = false;
void saveConfigCallback () {
Serial.println("Should save config");
shouldSaveConfig = true;
}

void setup() {
Serial.begin(115200);
Serial.println();
pinMode(SET_PIN, INPUT_PULLUP);
delay(3000);
//read configuration from FS json
Serial.println("mounting FS…");
if (SPIFFS.begin()) {
Serial.println("mounted file system");
if (SPIFFS.exists("/config.json")) {
//file exists, reading and loading
Serial.println("reading config file");
File configFile = SPIFFS.open("/config.json", "r");
if (configFile) {
Serial.println("opened config file");
size_t size = configFile.size();
// Allocate a buffer to store contents of the file.
std::unique_ptr buf(new char[size]);
configFile.readBytes(buf.get(), size);
DynamicJsonBuffer jsonBuffer;
JsonObject& json = jsonBuffer.parseObject(buf.get());
json.printTo(Serial);
if (json.success()) { Serial.println("\nparsed json"); strcpy(blynk_token, json["blynk_token"]);
} else { Serial.println("failed to load json config"); } configFile.close(); } }
} else {
Serial.println("failed to mount FS");
}
WiFiManagerParameter custom_blynk_token("blynk", "blynk token", blynk_token, 32);
WiFiManager wifiManager;
wifiManager.setSaveConfigCallback(saveConfigCallback);
wifiManager.addParameter(&custom_blynk_token);
if (digitalRead(SET_PIN) == LOW) {
wifiManager.resetSettings();
}
if (!wifiManager.autoConnect("My NodeMCU")) {
Serial.println("failed to connect and hit timeout");
delay(3000);
ESP.reset();
delay(5000);
}
Serial.println("wifi connected");
strcpy(blynk_token, custom_blynk_token.getValue());
//save the custom parameters to FS
if (shouldSaveConfig) {
Serial.println("saving config");
DynamicJsonBuffer jsonBuffer;
JsonObject& json = jsonBuffer.createObject();
json["blynk_token"] = blynk_token;
File configFile = SPIFFS.open("/config.json", "w");
if (!configFile) { Serial.println("failed to open config file for writing");
}
json.printTo(Serial);
json.printTo(configFile);
configFile.close();
}
Serial.println();
Serial.print("local ip : ");
Serial.println(WiFi.localIP());
Serial.print("Blynk Token : ");
Serial.println(blynk_token);
Blynk.config(blynk_token);
}
void loop() {
Blynk.run();
}
สำหรับโปรแกรมที่นำเสนอในโครงงานนี้ คงจะพอเป็นแนวทางให้ผู้อ่านสามารถนำไปทดลองเพื่อใช้งานได้ง่ายขึ้นนะครับ สำหรับผู้เขียนได้ทดลองและสามารถใช้งานได้ดีเป็นที่น่าพอใจ สามารถตรวจสอบการเชื่อมต่อกันระหว่าง NodeMCU ESP8266 และบนโทรศัพท์ได้และควบคุมวิดเจ็ดต่างๆ ในแอพพลิเคชัน (Application Blynk) ได้อย่างถูกต้องครับ.
Library for NodeMCU-12E
- https://github.com/tzapu/WiFiManager
- https://github.com/esp8266/Arduino/blob/master/libraries/DNSServer/src/DNSServer.h
- https://github.com/bblanchon/ArduinoJson
- https://github.com/esp8266/Arduino/blob/master/cores/esp8266/FS.h
- https://github.com/esp8266/ESPWebServer
Reference